How to Prepare Print-Ready Artwork: A Step-by-Step Guide
Ready to see your artwork pop off the page? At Print Lover, we believe creating standout print should feel simple, enjoyable and completely stress-free.
We’ve put together this handy step-by-step guide to make sure your artwork is fully print-ready and set up to make a lasting impression. No jargon or guesswork - just a smooth path to getting your artwork perfect for print and into the hands (and hearts) of the right people.
Step 1: Size Matters
First things first, make sure your artwork matches the final dimensions of your product - it’s the easiest way to avoid any unwanted cropping or scaling.
Our artwork templates are made to fit perfectly, so it’s always worth using them. Just remember to consider both the finished size and the flat size to keep everything looking exactly as it should.
Step 2: Don’t Cut Corners
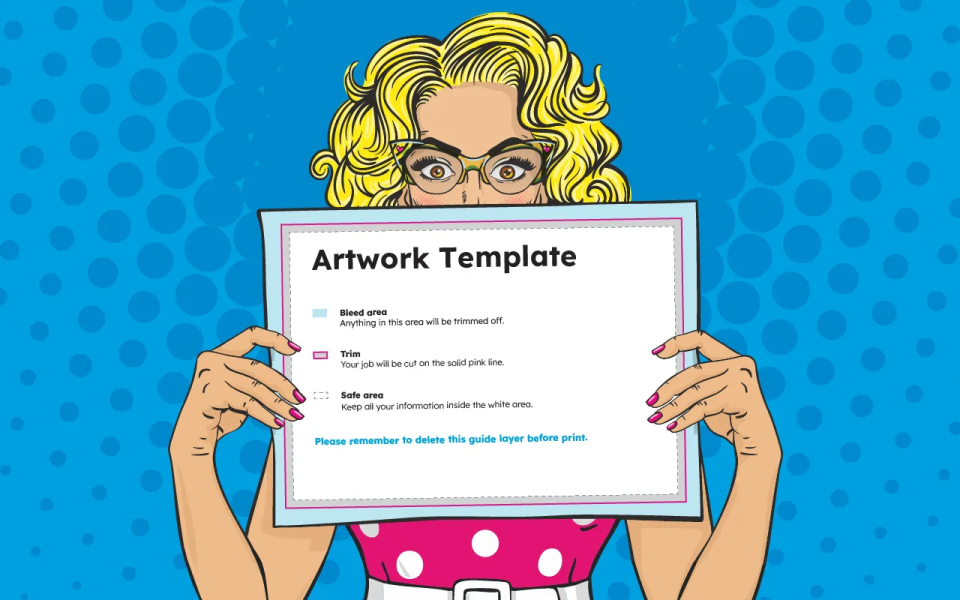
Add a 3mm bleed on all sides so colours and images extend beyond the trim - it’s a small detail that makes a big difference to the final finish.
Keep all important content within the safe area, away from the edges, and make sure any crop or printer marks are removed from your final file before uploading.
Step 3: Lock In Colours
Print uses CMYK, not RGB - so setting your artwork up correctly helps ensure colours come out just as you expect.
We can convert colours if needed, but starting in CMYK puts you firmly in control of how your final print will look.
Step 4: Keep It Crisp
Use images at a minimum of 300dpi at their final size to keep everything looking sharp, crisp and professional.
Lower resolutions can impact the finish, so starting with high-quality images is always the safest way to get the best results.
Step 5: Favourite Fonts
Got a favourite font in mind? Make sure it’s embedded or outlined in your PDF to prevent any substitutions and keep your layout looking exactly as intended.
Step 6: Count Your Pages
Booklets need to be in multiples of four (4pp, 8pp, 12pp, and so on) to ensure everything lines up perfectly once printed and bound.
Double-check your page order and layout and follow our templates to keep everything aligned just as it should be.
Step 7: File Format
We accept PDF files only - it’s the best way to keep everything consistent and print-ready. Make sure your file:
- ♥ Is not password protected
- ♥ Is under 20MB
- ♥ Has the correct size, orientation and page count
Getting these details right up front helps keep everything running smoothly.
Step 8: Run The Checklist
Before uploading, run through our artwork checklist to make sure everything’s spot on:
- ♥ Correct artwork size
- ♥ Page count confirmed
- ♥ Templates used
- ♥ 3mm bleed included
- ♥ No visible crop marks
- ♥ Images at 300dpi
- ♥ CMYK colour mode
- ♥ Fonts embedded
- ♥ File under 20MB
- ♥ No password protection
Step 9: Validate And Preview
Once uploaded, your artwork is automatically checked to make sure everything’s good to go. You’ll see:
- ♥ Red alerts if something needs fixing
- ♥ Green confirmation when everything looks good
We’ll apply fixes where possible, but it’s always worth reviewing your preview carefully before adding to basket, just to be sure everything looks exactly as you expect.
Step 10: Ready To Go!
Once approved, your artwork is ready for production!
Creating print-ready artwork doesn’t need to be complicated. With the right setup and a bit of attention to detail, you’re well on your way to print that looks incredible and feels even better.
Ready to bring your design to life? Explore business cards, booklets, leaflets and more, and start creating print you’ll fall in love with today!